Looking to install a water heater but unsure where to start? This comprehensive guide demystifies the installation of water heaters, providing you with the knowledge to either tackle the job yourself or to be well-informed when working with a professional. From selection to setup, we’ll break down each step ensuring safety, efficiency, and compliance with local regulations.
Key Takeaways
- Proper preparation before installing a water heater includes compliance with local building codes, choosing the correct size based on household needs, and gathering necessary tools and materials avoiding potential galvanic corrosion.
- Shutting down the old system safely includes turning off the water and power supply, cooling down your water heater, and draining the tank completely to avoid the risk of burns or scalding.
- For the new water heater installation, correct placement, secure connections, and finalizing gas or electrical connections are critical. After installation, thorough checking for leaks and ensuring the correct setup is essential, followed by optimizing energy efficiency through temperature settings and insulation.
Preparation for Water Heater Installation
Before getting started, there are several crucial factors to consider. First, you need to ensure your installation complies with local building codes. These codes are there to ensure safety and efficiency standards are met, so you don’t want to overlook this step.
Following that, choosing an appropriately sized water heater is important. This is influenced by a range of factors like your household size, usage patterns, and potential simultaneous usage. You don’t want to end up with insufficient hot water or an oversized unit that’s inefficient and reduces the lifespan of your heater. A licensed plumber or manufacturer’s recommendations can guide you in making this decision.
Choosing the Right Water Heater
The selection of the right water heater requires consideration of factors such as your local climate, anticipated household growth, and potential lifestyle changes. You also need to evaluate the efficiency levels and running costs of both gas and electric water heaters.
Moreover, the availability of natural gas or electricity in your home is a decisive factor when choosing between gas and electric water heaters. This guide will assist you in selecting the right electric water heater to match your specific requirements.
Gathering Tools and Materials
Once you’ve made your water heater selection, the next step is to collect your tools and materials. Before attaching water supply lines, clean the water pipe threads with a wire brush to ensure a secure connection.
Flexible copper connectors are recommended for easier installation compared to solid copper piping. However, avoid pinching or kinking them during installation. Use short, plastic-lined nipples to shield against galvanic corrosion in water heater installation. If you’re transitioning from plastic to copper pipes, use the special coupling available where CPVC is sold.
Shutting Down the Old System
Prior to the installation of your new water heater, the existing system must be shut down. This means shutting off the main water supply to prevent any water flow into the home. To do this, locate the knob on the cold water line and turn it using gentle torque until it can no longer be turned.
Don’t forget to let the water heater cool down for several hours after shutting off the water supply. This will help prevent the risk of burns during the disconnection process.
Turning Off the Power Supply
To disable the power supply, simply switch off the circuit breaker. The main electrical panel, which houses the circuit breaker, is usually located in the basement, garage, or a utility area of the home.
If you have a gas water heater, you’ll need to:
- Turn off the gas control valve to the water heater
- Use a quarter turn to close the nearby shutoff valve
- Turn off the main gas supply valve to ensure the gas is completely shut off before starting the disconnection process.
Draining the Water Tank
The subsequent step involves draining the cold water tank. Before you start, run hot water from a hot water tap until it cools to reduce the risk of scalding. Attach a hose to the drain valve at the base of the water heater or place a bucket beneath the valve to collect water.
Place the other end of the garden hose in a suitable drainage area, and then open the drain valve to empty the tank. Remember, patience is key here. Draining the tank can take some time, so don’t rush the process.
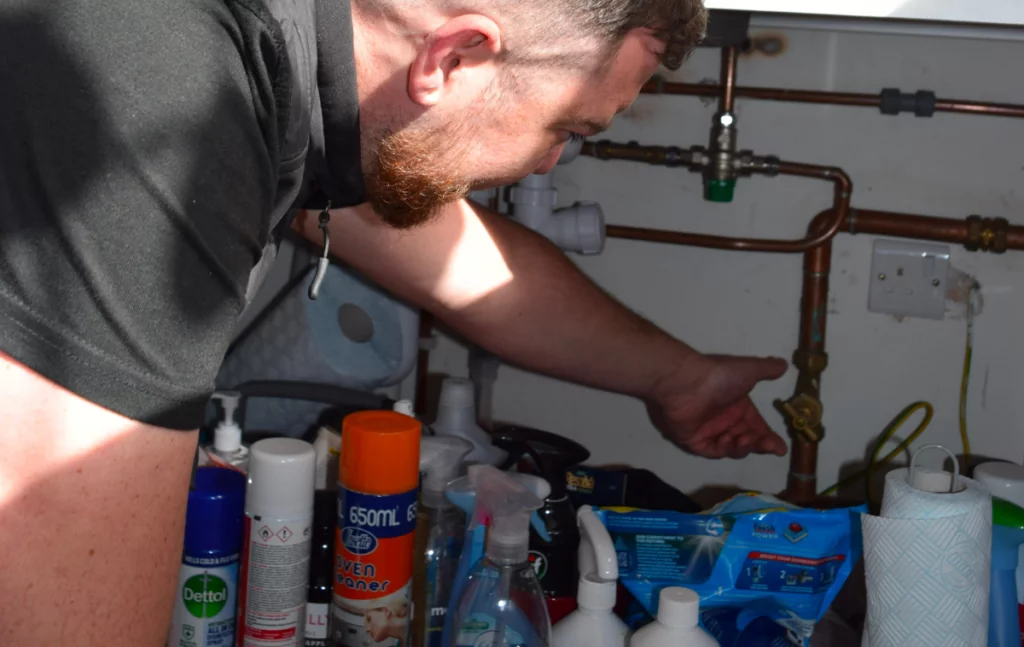
Removing the Old Water Heater

Although the removal of the old water heater might pose a challenge, with adequate preparation, water heater replacement can be accomplished safely and efficiently. Before you start, put on safety gloves and goggles and keep a fire extinguisher nearby if the water heater uses gas.
Clear the area around the water heater to create a safe and unobstructed workspace. You’ll need two wrenches to unscrew the water pipes or a pipe cutter to sever them, especially in cases of hard plumbed pipes. For copper pipes, use a tubing cutter to disconnect them from the water heater, and be prepared to catch any residual water with a container or towel.
Turn off the gas supply by rotating the shutoff valve a quarter turn to a right angle with the pipe and verify that the water heater is off.
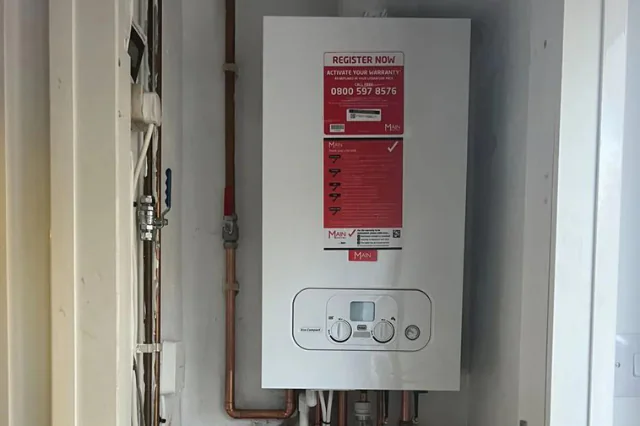
Installing the New Water Heater
With the old water heater out of the way, you can proceed with the installation of the new unit. Here are the steps to follow:
- Position the new water heater in the recommended area.
- Ensure it is properly set within a drain pan to prevent damage in case of leaks.
- Confirm its alignment before moving on.
Next, connect the cold water inlet to the water heater using appropriate fittings, ensuring a secure and accurate connection to prevent future complications. You’ll also need to adjust the length of the old tubing to appropriately meet the new heater’s inlets and outlets, and solder the tubing together using copper slip couplings for a solid seal. Don’t forget to check the cold water valve for proper functioning.
Lastly, install a dedicated water shutoff valve to enable easy maintenance and the addition of earthquake straps to secure the water heater in place, especially in seismic areas.
Attaching the Discharge Pipe
Following that, the discharge pipe should be attached to the new water heater. Before installation, wrap the threads of the new temperature and pressure relief valve with Teflon tape to ensure a waterproof seal.
Install the new pressure relief valve with a new gasket to the water heater tank properly. After installation, slowly open the water valve to check for any leaks at the new pressure relief valve.
Connecting Water Supply Lines
Accurate connection of the water supply lines is of utmost importance. Ensure you are attaching the cold water supply line to the cold water inlet and the hot water supply line to the hot water outlet on the water heater.
Leave some space when connecting the hot and cold water supply lines to allow for any necessary adjustments and alignment for a secure installation. A little bit of space can make all the difference in preventing future issues.
Finalizing Gas or Electrical Connections
Concluding the installation process requires finalizing the gas or electrical connections. If you have an electric water heater, you’ll need to install a 2-pole, 30-amp breaker with a 10-2NM cable.
Before beginning any electrical work, verify the water heater’s tank is empty and the circuit is dead using a voltage meter. For gas connections, loop any excess flexible gas line to prevent kinks and leave slack away from the vent area.
Fill the tank with water, turn on the gas supply, and follow the manufacturer’s instructions to light and verify the stability of the pilot light.
For Gas Water Heaters
For those with a gas water heater, several additional steps are necessary. Firstly, make sure the gas supply is switched off before making any connections.
Install a sediment trap close to the inlet on the gas line to the water heater to catch debris and moisture. Clean the threads of the gas inlet on the water heater using a wire brush to ensure a clean surface for the connection. Apply pipe joint compound or yellow gas-rated Teflon tape on the gas line fittings’ threads to prevent leaks. Connect the gas supply line to the water heater’s gas control valve, first by hand, then secure it using wrenches without over-tightening.
Lastly, inspect all gas connections with a leak detection solution, checking for any signs of bubbling which indicate a leak.
For Electric Water Heaters
In the case of electric water heaters, the electrical wires must be connected to the heater’s junction box. Run the electrical wires through a ROMEX connector and tighten to avoid any exposed wires.
Fish the wires through the knockout in the junction box properly. Utilize a lock nut to securely position the ROMEX connector inside the junction box, ensuring it does not make contact with water pipes.
Checking the Installation
After the installation of your new water heater, a thorough inspection of the setup is vital. After the water heater is filled, ensure that the pressure relief valve and the drain valve are closed before restoring the water supply and power.
To troubleshoot a leaking water heater, follow these steps:
- Remove any trapped air from the system by turning on the hot water faucets intermittently as the water heater fills.
- Inspect the plumbing pipes above the water heater to rule out the possibility of drips mimicking a tank leak.
- Check the water supply tubes for leaks, as they often fail before the water heater needs replacement.
Examine the water heater nipples at the cold water inlet and hot water exit pipes for any signs of leaks. Inspect the drain valve at the bottom of the water heater for leaks, especially if it has recently been used to drain or flush the system.
Energy Efficiency Tips

With your new water heater installed and verified, the focus shifts towards optimizing its energy efficiency. Setting the water heater temperature to 120°F optimizes energy efficiency and safety.
You can also take the following steps to save energy and reduce heat loss from your water heater:
- Insulate older, uninsulated water heater tanks with a tank jacket
- Install under-sink water heaters to eliminate energy losses associated with long pipe runs and standby heat loss
- Fix dripping taps promptly, as even minor leaks can lead to significant water and energy waste over time.
Insulation and Settings
Enhancing your water heater’s efficiency requires correct thermostat settings and proper insulation of your downpipes. Setting the water heater’s thermostat to the desired temperature is a critical step in the installation process. A starting temperature of 120°F is often recommended for balancing safety and energy efficiency.
Insulating ‘downpipes’ that are accessible from the cistern to the taps can significantly reduce heat loss, thereby improving energy efficiency. Insulation is particularly beneficial near the water heater, preventing heat escape and energy waste due to thermosiphoning within the first few feet of the tank.
Regular Maintenance
Regular preventive maintenance of water heaters aids in maintaining efficient energy consumption and extending the unit’s optimal lifespan. Annual maintenance is recommended for industrial or commercial water heaters, while residential units should have maintenance checks every six months.
Maintenance should include:
- Checking valves for potential leaks
- Flushing sediment buildup to improve heating efficiency
- Assessing and replacing the anode rod as needed to prevent tank corrosion
- Carefully refilling the tank to eliminate air pockets.
Performing maintenance in the autumn season is advantageous as it readies the water heater for the higher demand during colder months.
Summary
In conclusion, installing a water heater can be a manageable task for homeowners with the right tools, safety precautions, and instructions. From the initial preparation to the final checks and energy efficiency tips, this guide has walked you through the entire process. Remember, safety and precision are key in each step of the installation process. And with regular maintenance, your newly installed water heater will provide efficient and reliable hot water for years to come.
Frequently Asked Questions
Can I install a water heater by myself?
It’s possible to install a water heater if you’re experienced in basic electricity and plumbing, but if not, it’s best to seek professional assistance.
Do you need a professional to install a hot water heater?
Yes, it is advisable to hire a professional to install a hot water heater as they can ensure a correct and safe installation, saving you time and potential troubleshooting efforts. While you may need a permit to install a water heater in most areas, seeking expert help is recommended.
What not to do when installing water heater?
When installing a water heater, avoid picking the wrong size, improper placement, failure to follow instructions carefully, incorrect drain line and pan setup, faulty pressure relief valve, and dry firing the new water heater. Make sure to take these precautions to ensure a successful installation.
How do I choose the right water heater for my home?
Consider your climate, household size, usage patterns, and available utilities (gas or electricity) to choose the right water heater for your home. These factors will help you make an informed decision.
How often should I perform maintenance checks on my water heater?
It is recommended to perform annual maintenance checks on commercial water heaters and bi-annual checks on residential units, with more frequent checks in areas with hard water. Regular maintenance helps ensure the efficient and safe operation of your water heater.

Matthew Fowler
The content within this page has been approved by Matthew Fowler